
Run your first job
This walks you through one real job: a PyTorch container, one hour, with a folder mounted so your work survives. By the end you will have a shell inside a container on a GPU node.
You need an account in a tenant, and that account needs tokens and permission to add jobs. If you do not have those yet, your tenant administrator does - signing in explains how accounts come into being.
The short version
Section titled “The short version”-
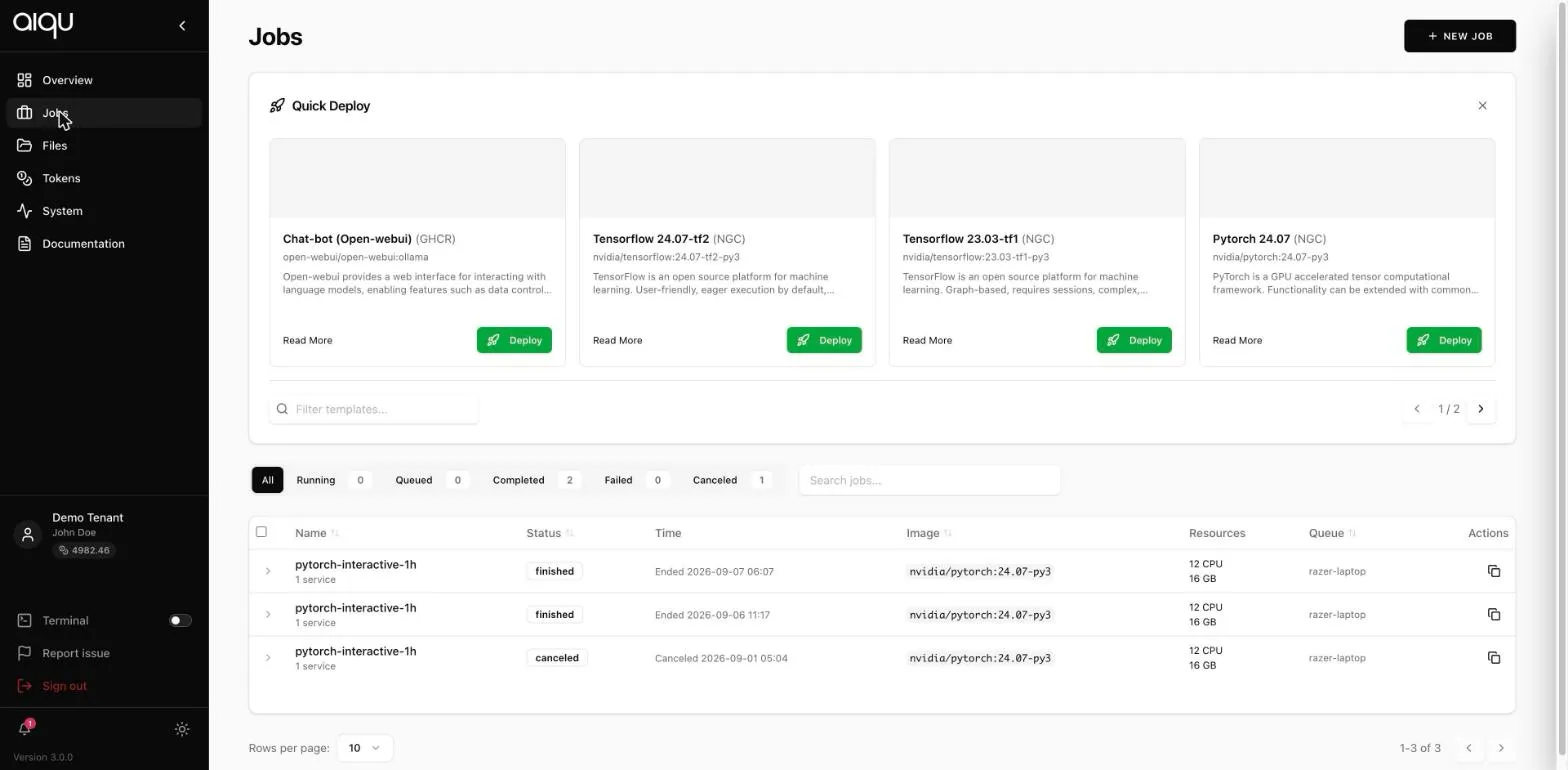
Open Jobs and choose NEW JOB.
The Jobs page is the whole product, really. Everything else supports it.
-
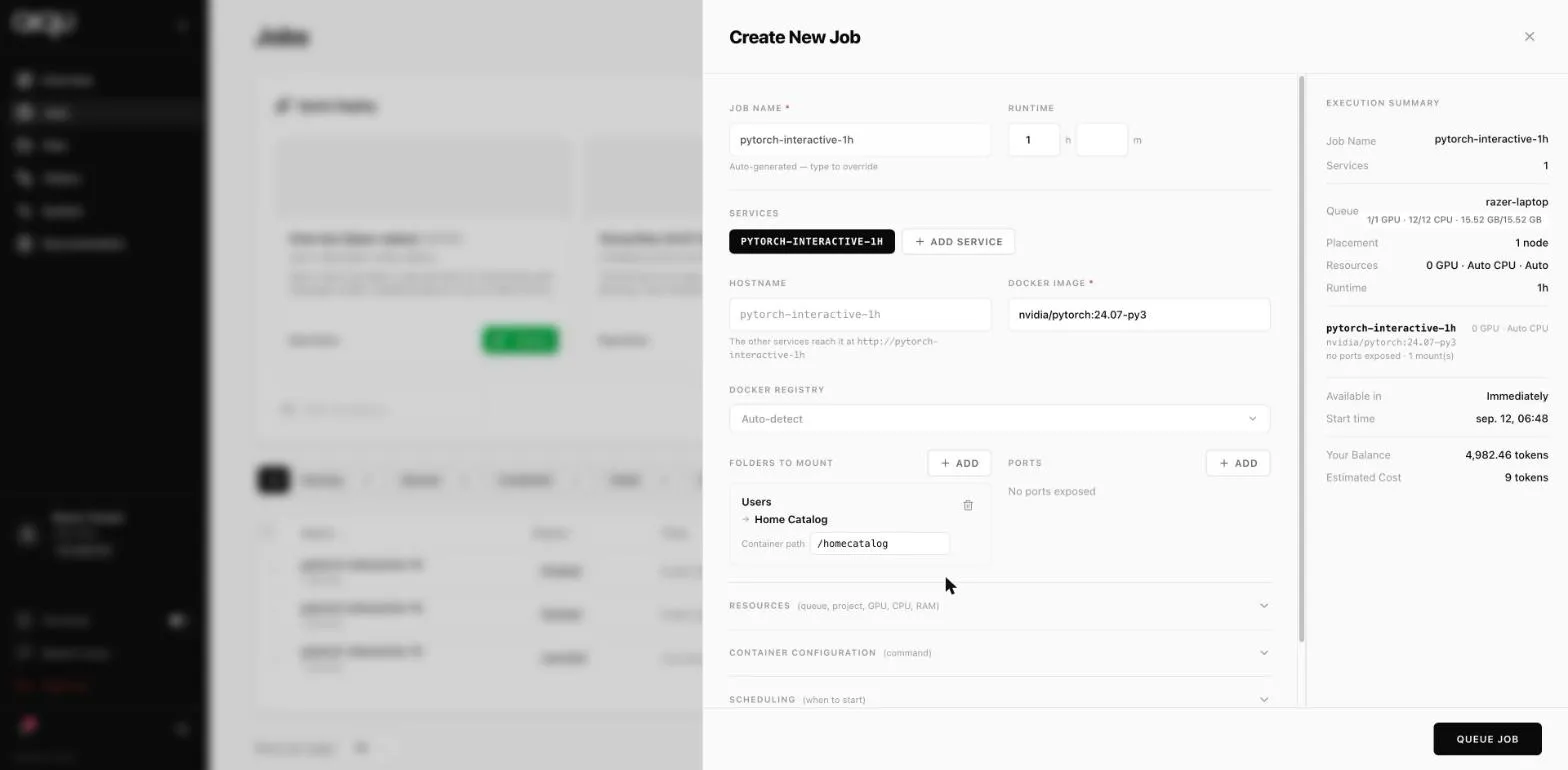
Name an image.
Type
nvidia/pytorch:24.07-py3into Docker image. The job name fills itself in from the image; override it if you want.Leave Docker registry on Auto-detect. It only matters for private registries, which Docker images covers.
-
Set a runtime.
One hour is the default and is plenty here. When it expires the container stops, so pick something longer than you think you need - you can extend it later, but only while it is still running.
-
Mount a folder.
Under Folders to mount, choose + ADD, pick your bucket, and MOUNT. It appears with a container path such as
/homecatalog.This is the step people skip. Without it, everything you write inside the container is deleted when the job ends.
-
Read the summary, then queue it.
The right-hand panel is telling you four things worth checking before you spend anything: which queue it will land on, when it is available, what it will cost, and whether anything is mounted.
Choose QUEUE JOB.
-
Watch it start.
The job appears as
bookedand moves through torunningon its own; the list refreshes itself.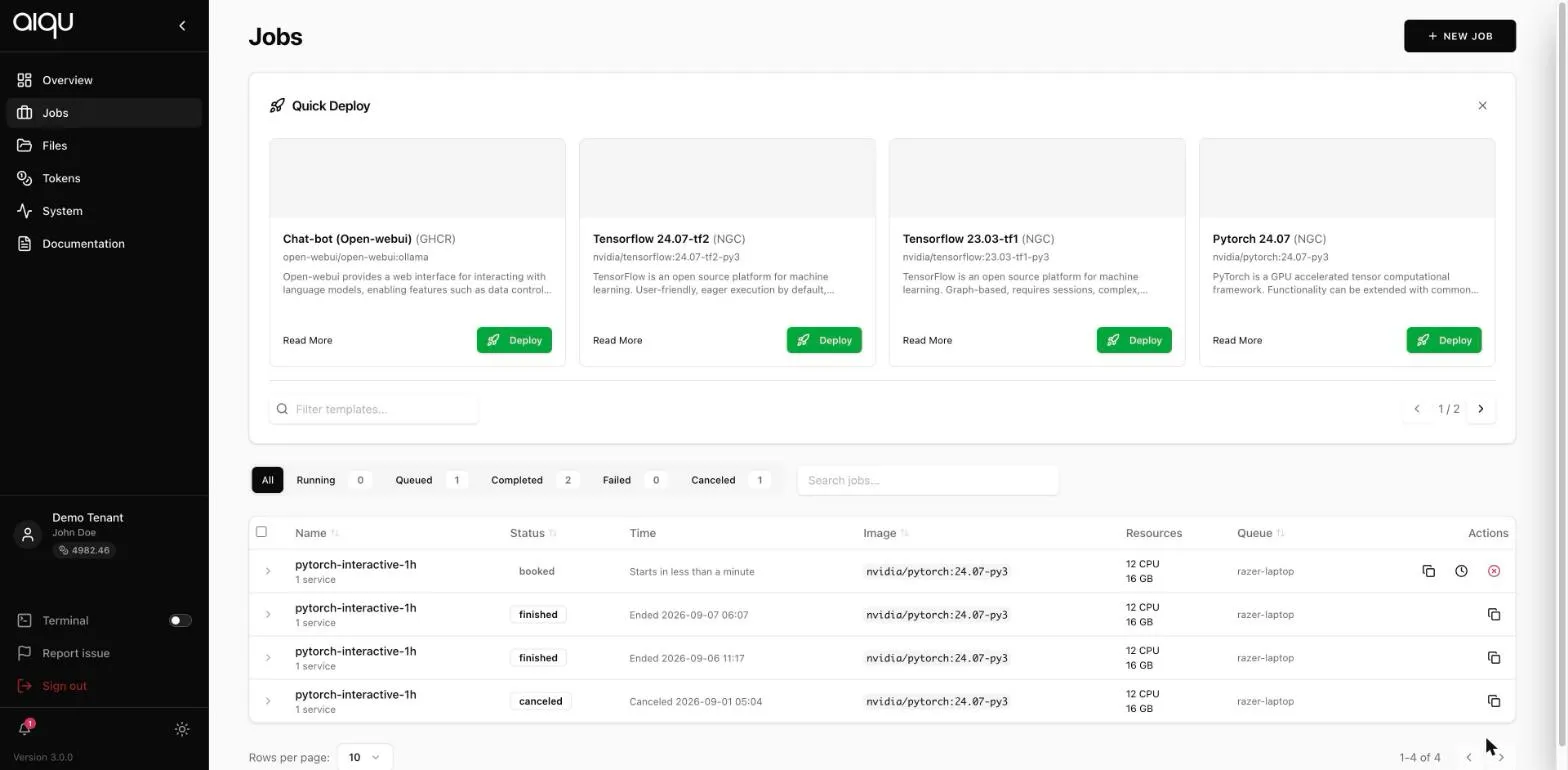
-
Get a shell.
Expand the job row, select the service inside it, and use Terminal in the detail panel header. You are root inside your container.
What just happened
Section titled “What just happened”You put a job on a queue. The queue had one node that was online and had a free
GPU, so the scheduler booked your job onto it, pulled the image, and started the
container with your bucket mounted at /homecatalog.
From this moment the job is spending tokens every minute, whether or not you are doing anything with it. Cancel it when you are done - the runtime is a ceiling, not a target.
If it did not start
Section titled “If it did not start”| What you see | Usually means |
|---|---|
| QUEUE JOB stays greyed out | No image, a runtime of zero, or you lack the add-job permission on that queue |
| “This queue has no node that can run a job right now” | Every node in the queue is offline or disabled |
Job sits at queued and never books |
The queue’s nodes are busy; the summary’s “Available in” told you this before you submitted |
failed almost immediately |
Nearly always the image: a typo, or a private registry without credentials |
Troubleshooting goes through each of these properly.
Then what
Section titled “Then what”Expose the port your app listens on and open it as a proxy. See Ports and proxies.
Expose port 22, run an SSH server in the container, and connect from your own machine. See Terminal and SSH.
Upload to a bucket from the Files page, then mount that bucket. See Files and storage.