
Tenants
A tenant is a tenant. The Tenants page lists every one on the installation.
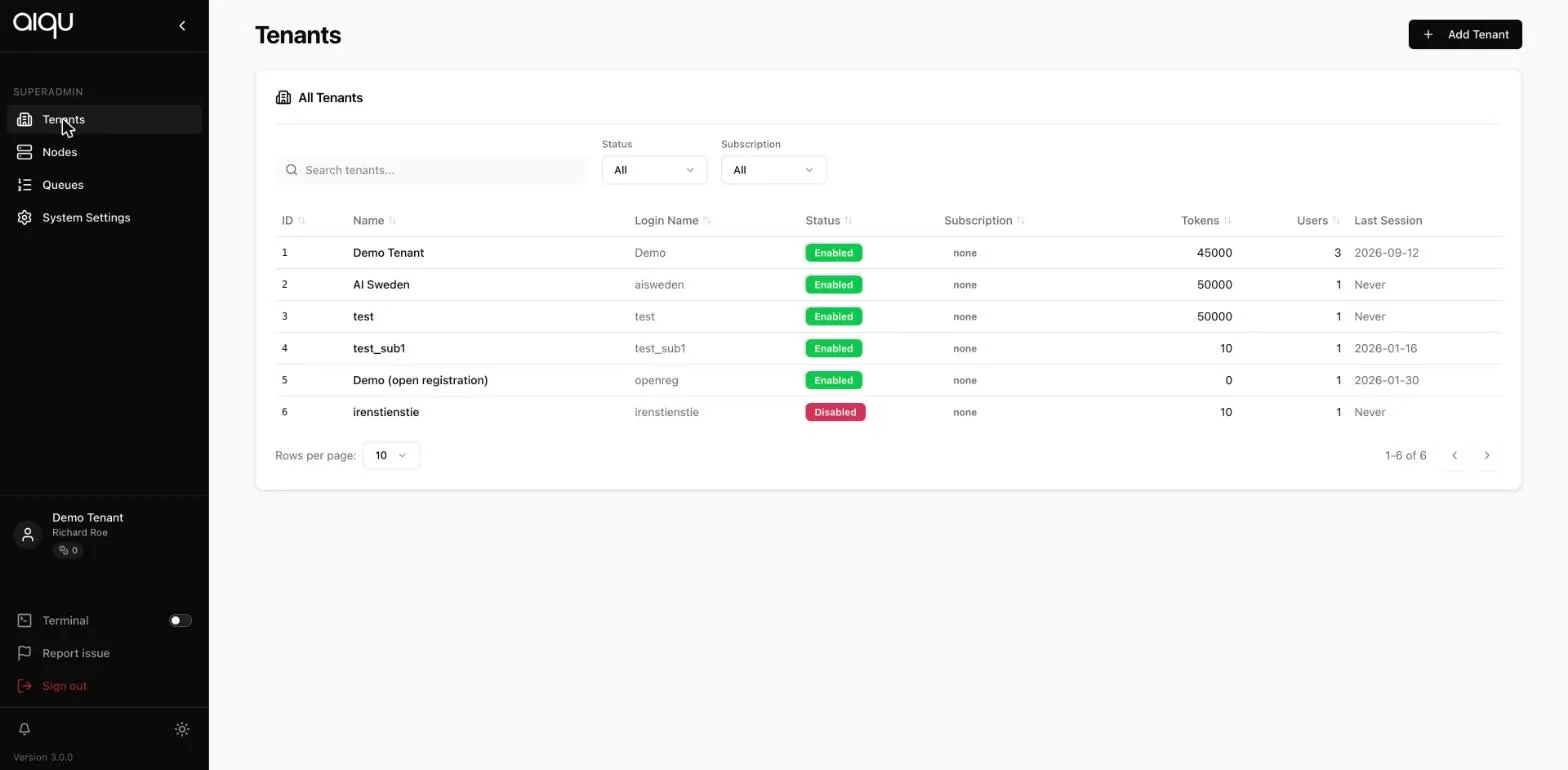
Each row gives the tenant’s id, name, login name (the identifier its users sign in against), status, subscription, token balance, user count and last session. The filter matches on name or login name.
Creating one
Section titled “Creating one”A name and a login name are all that is required. A tenant can be created already disabled, which is the right choice when you are preparing it ahead of handing it over.
Editing one
Section titled “Editing one”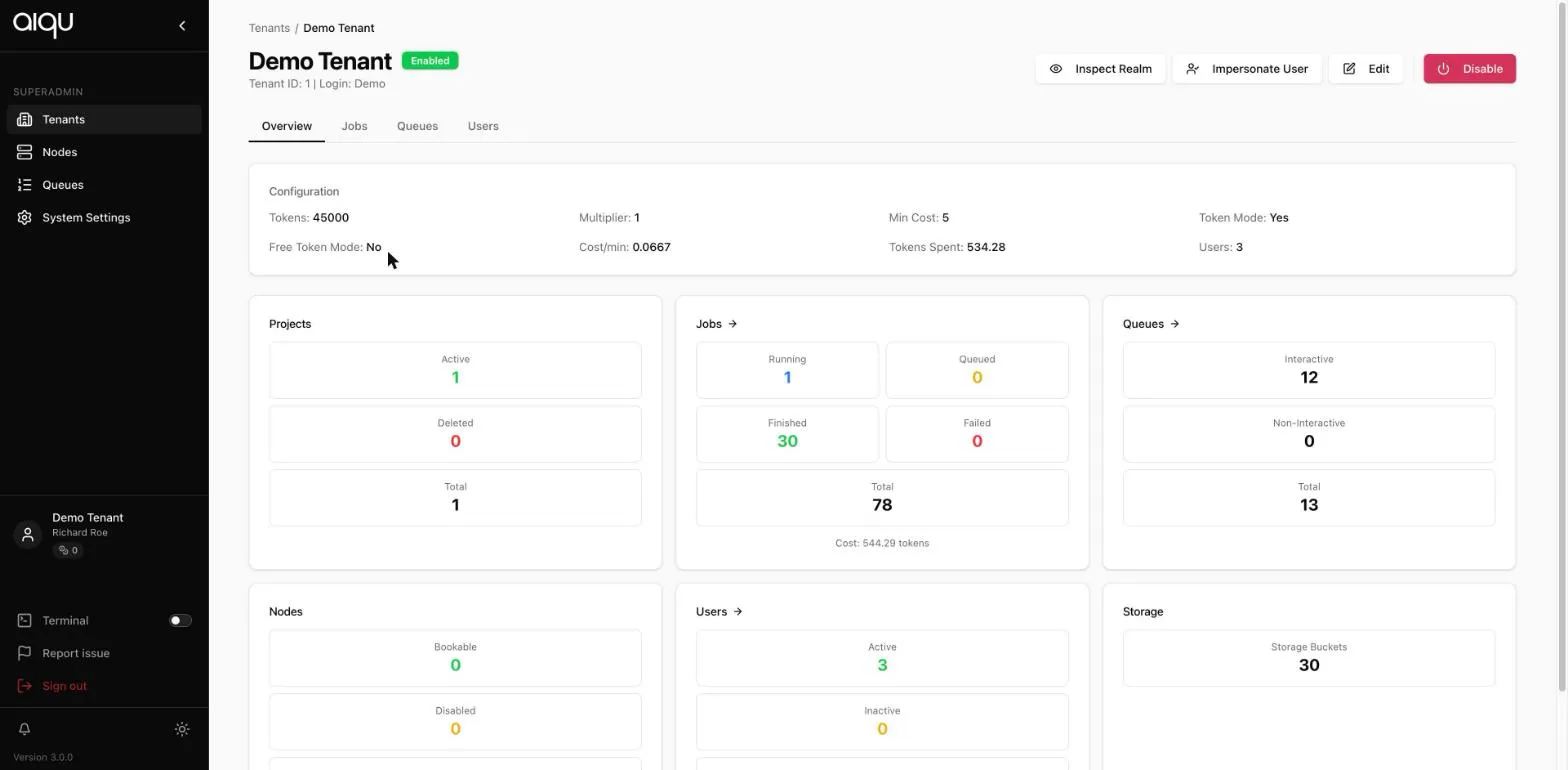
The detail page opens on Overview, with the tenant’s configuration and counts for projects, jobs, queues, nodes, users and storage. Tabs lead to each of those in turn.
Pricing
Section titled “Pricing”| Setting | Effect |
|---|---|
| Token mode | Whether the tenant uses tokens at all |
| Free token mode | Tokens are tracked but not enforced |
| Multiplier | Scales this tenant’s costs against the platform base rates |
| Min cost | A floor under any single job |
| Cost/min | The resulting per-minute rate |
The base rates come from System settings; the multiplier and minimum are how one tenant comes to cost more or less than another.
Feature flags
Section titled “Feature flags”Per tenant:
- Free token mode
- Job advanced view - whether users get CPU and RAM selectors
- User token purchase - whether users may buy their own tokens
- Open registration - whether people may sign themselves into this tenant
Disabling
Section titled “Disabling”Disabling a tenant, with confirmation, stops its users from using the service. The data stays. This is the reversible control; there is no tenant deletion in the same place, deliberately.
Inspecting
Section titled “Inspecting”A tenant’s detail tabs let you look at its Users, Projects, Jobs, Queues, Nodes and Storage buckets without entering it. Users are listed with their id, name, email, last session, whether they are a tenant admin and whether they are active.
Looking is enough for most support questions. Changing means entering the tenant.