Exposing ports
Exposing ports in the container can be a useful way to interact with a job. The ports that will be exposed are selected before adding the job to the queue. After the job has started the user has to set the state of the port in the job details pop-up, accessible by clicking on the job in the table on the jobs page. When a port is exposed it can be either:
Private: Only accessible by the user who is running the job.
Public: Exposed to the internet and can be accessed by anyone. Use together with IP-filter to restrict public access.
Closed: Not accessible. Starting state.
Below you can find some tutorials for different use cases.
Setup SSH-server in container
One of the most common use cases is to make the job container accessible via SSH. This allows the user to get a direct connection to the container with a terminal, but can also been used to connect for example Visual Studio Code to the container and write code there directly.
To connect to our running job we will:
Start a job with a initialization script mounted and port 22 added
Connect to the running job with the terminal in the web gui
Run the script
Expose port 22 to the public from the container
Connect to the ssh-server with a terminal
Add the script to you home folder
To ssh into the container we will need a user and a ssh-server. For your convenience have we created a script that will create all this for you. The script is called init-ssh.sh and can be found at the AiQu Utilities repository. What the script does is creating a user, installing openssh-server and running it. If you want to do it yourself or tweak the script somehow, you are free to do so.
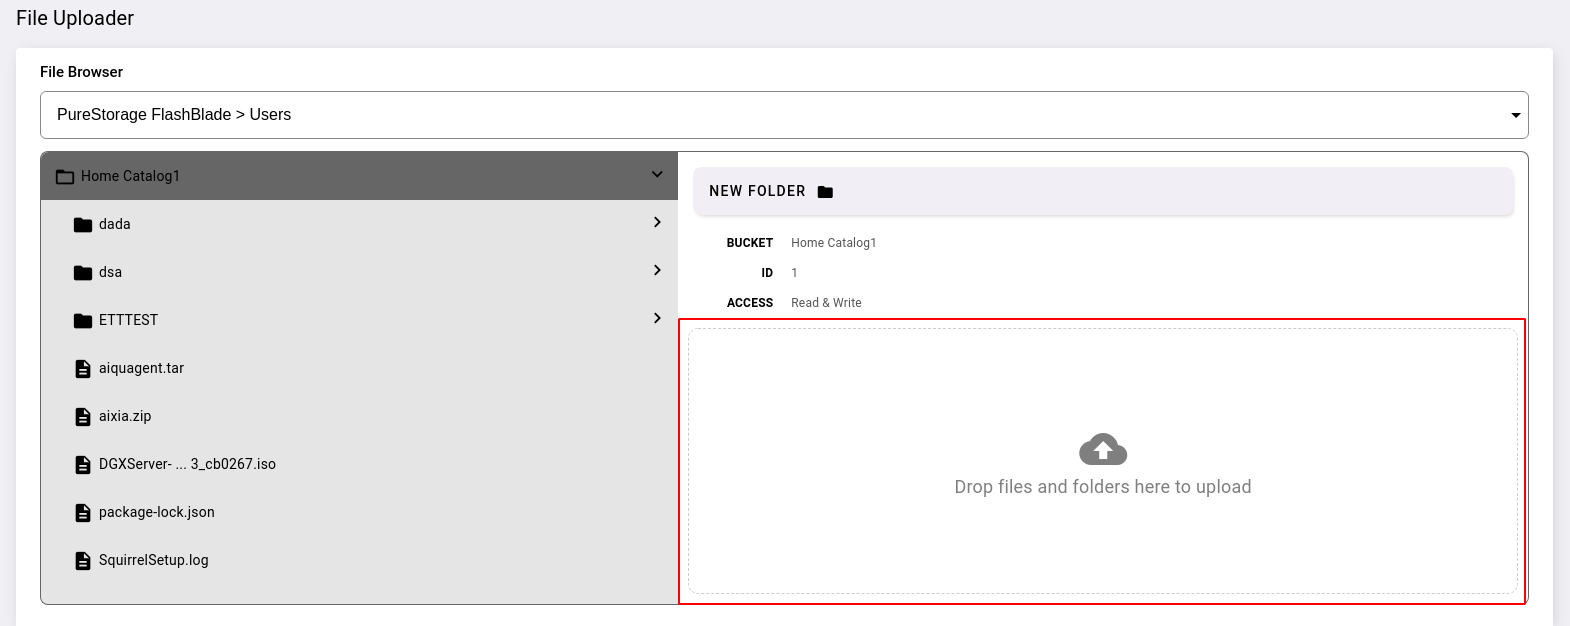
After downloading the script, go the the Files page and pick your home folder in the file browser. From there you can upload the script by dragging it in and clicking upload:

Run the job
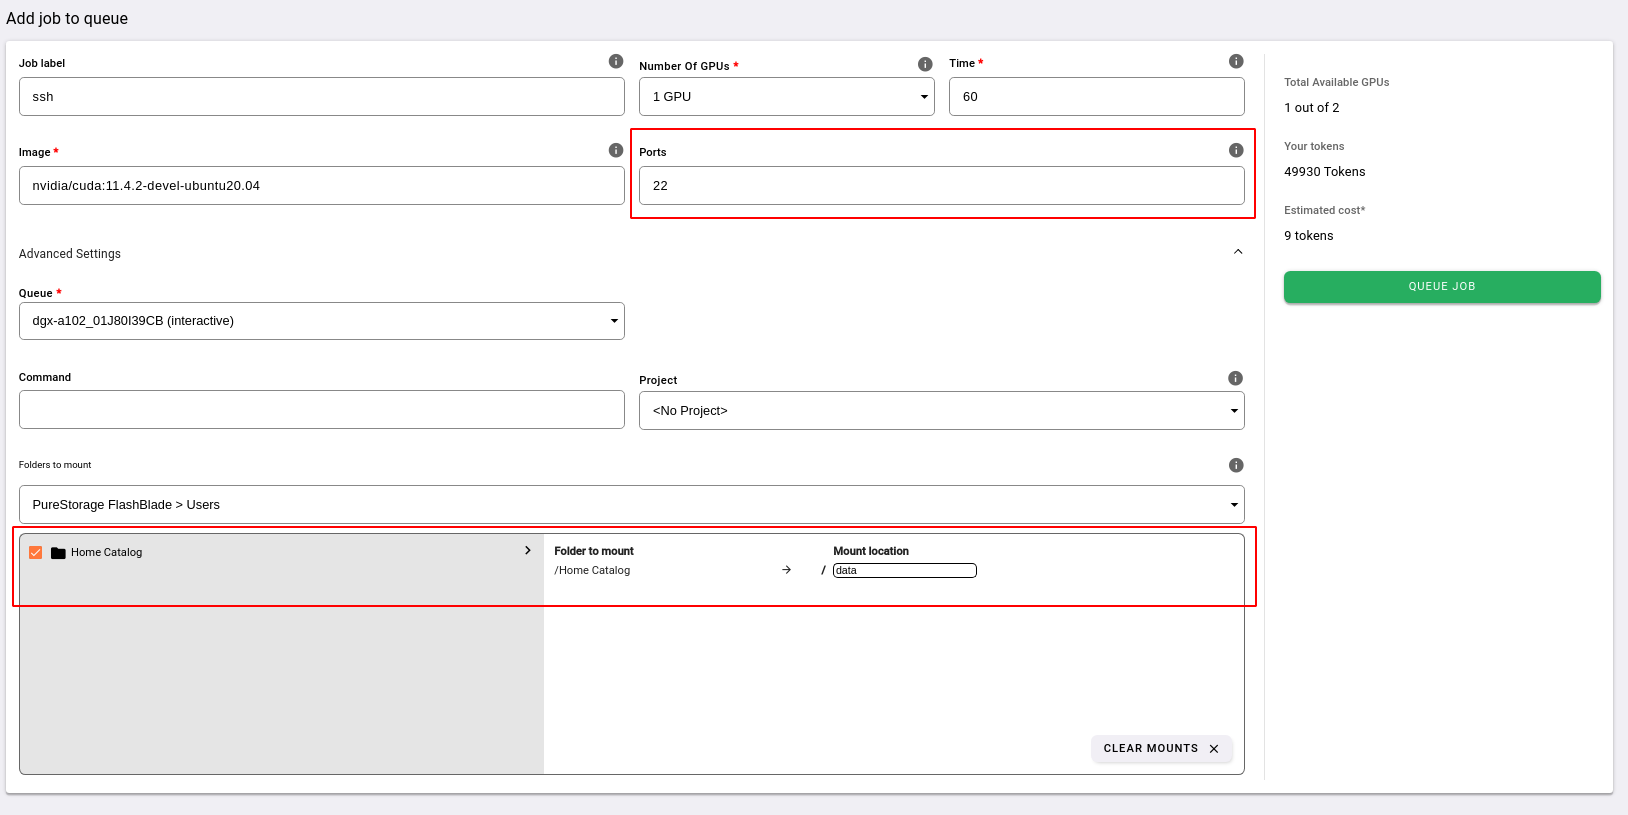
Now we can start the job. Go to the jobs page and fill in the following parameters:
Job label: ssh
Number of GPUs: 1
Time: 60
Image: nvidia/cuda:11.4.2-devel-ubuntu20.04
Ports: 22
Queue: Pick a queue with available nodes
Folders to mount: Mount the folder that has the init script inside it. In my case this is the “Home Catalog” folder. If you wish to download the script from inside the container you can skip this parameter.

The two important parameters here are: Ports and Folders to mount. The port parameter tells us which port(s) we will have the ability to open and Folder to mount tells us which data we want to mount inside the container. The image we will I use is the offical nvidia cuda image from NGC, but feel free to use another image if you wish.
When you have filled in the parameters for the job you can add it to the queue by pressing the “Queue Job”-button.
Start ssh-server
When the job has started we want to connect to it with the web-terminal. To do this click on the three dots in the “Actions” column in the job table and choose “Terminal”. This will open up a terminal that is connected to the container via a websocket.

Once conncted, navigate to the mounted folder (in our case /data) and run the ssh.sh script with a username and password of your choice.

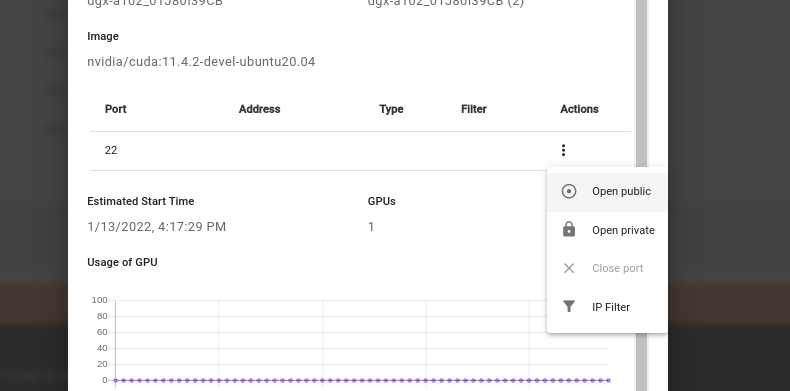
Minimize the terminal and click on the job in the “Queue & Job history” table. This will open up the job details popup where we can open the port by clicking on the three dots in the “Actions” column and selecting “Open public”.

After opening the port, a address will be displayed in the “Address” column on the table. We will use this address to SSH into the container.
Connect
Now we can connect to the container.
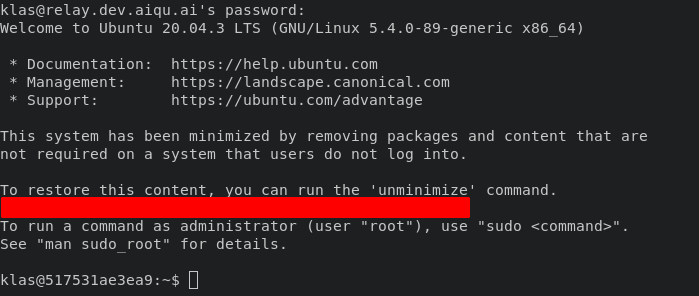
Open up a terminal of your choice (with ssh installed) and run ssh on this form: ssh  Add fingerprint:
 Type your chosen password:

And you are now connected to your job container!
Visual Studio Code
With a SSH-connection setup we can aforementioned connect our Visual Studio Code client to the container. Here is a guide on how to make this happen.